Firebase Authentication 이용하기
January 2, 2017
Firebase Authentication 이용하기
Firebase Authentication을 이용한 이메일/비밀번호를 이용한 로그인 구현 (Android)
Firebase는 2017년 1월 현재
이메일/비밀번호
Github
익명
위에 5가지의 로그인 방법을 지원하고 있다. ( Use a Custom Auth System 을 지원도 한다.)
저는 여기서 가장 손쉽게 구현해서 사용을 해볼 수 있는 이메일/비밀번호 를 이용한 가입 및 로그인를 소개 하도록 하겠습니다
저는 이번장에서는 Firebase의 프로젝트는 만들어져 있다는 가정하에 글을 작성하도록 하겠습니다.
만약 프로젝트를 만들기 전이라면은 https://isjang98.github.io/blog/Firebase-realtime-database 글을 참조하셔서 만드시면 됩니다.
이제 본격적으로 시작하도록 합니다. Firebase Console 가셔서 아래 그림과 같이 Firebase Console의
Authentication 에서 로그인 방법 을 선택합니다.
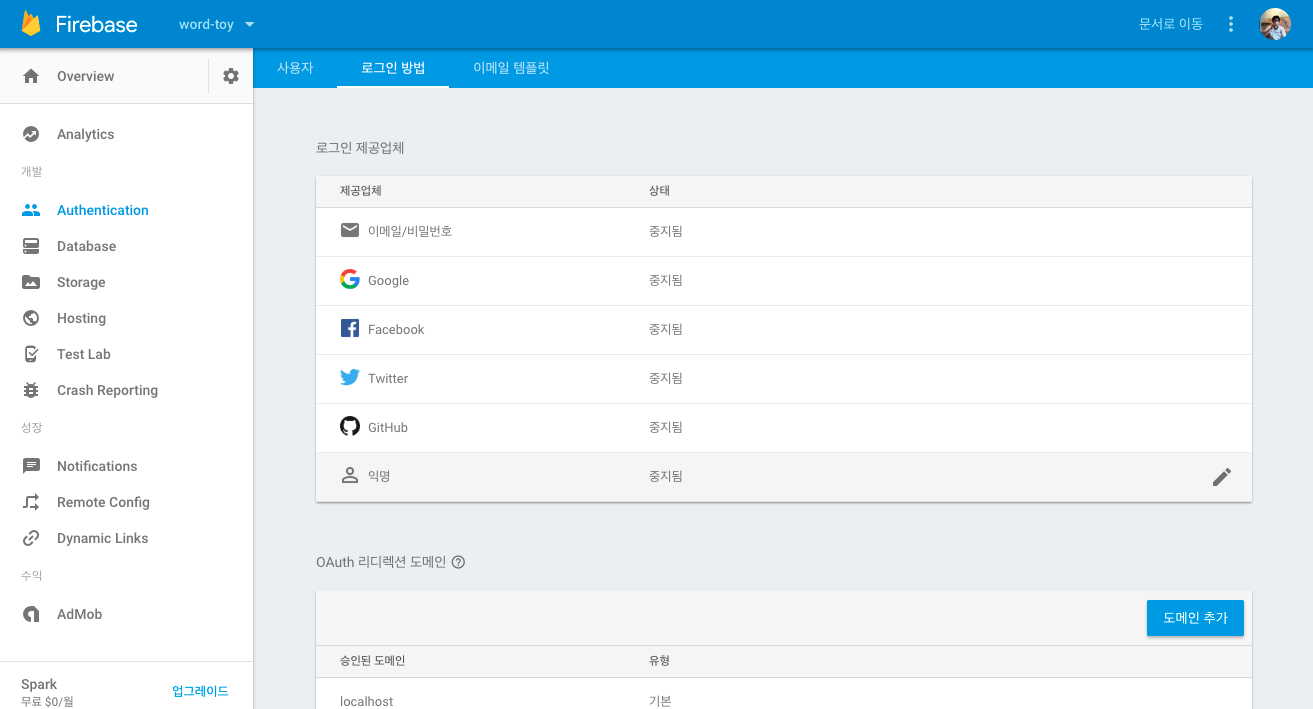
여기서 이메일/비밀번호 선택하시면 아래와 같이 나옵니다.
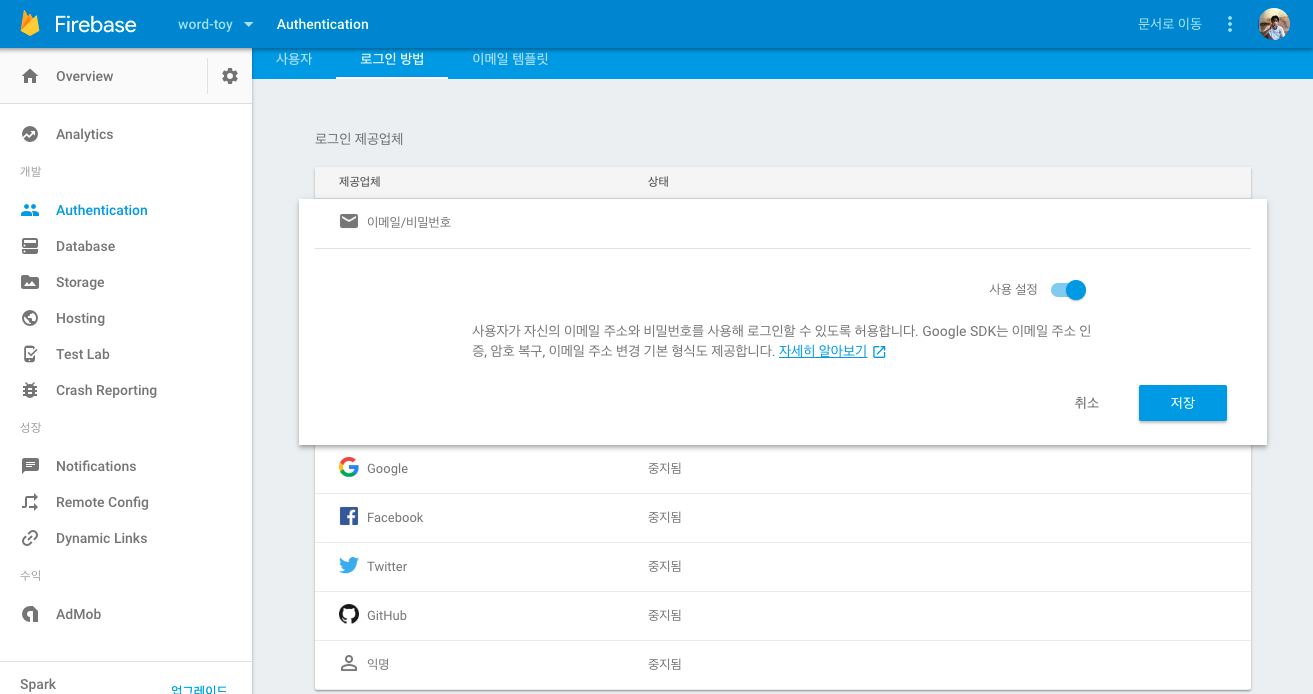
여기서 “사용설정” 을 활성화 하시고 저장을 누르면
이메일/비밀번호 의 상태가 사용 설정됨 으로 되신것을 확인할수 있습니다.
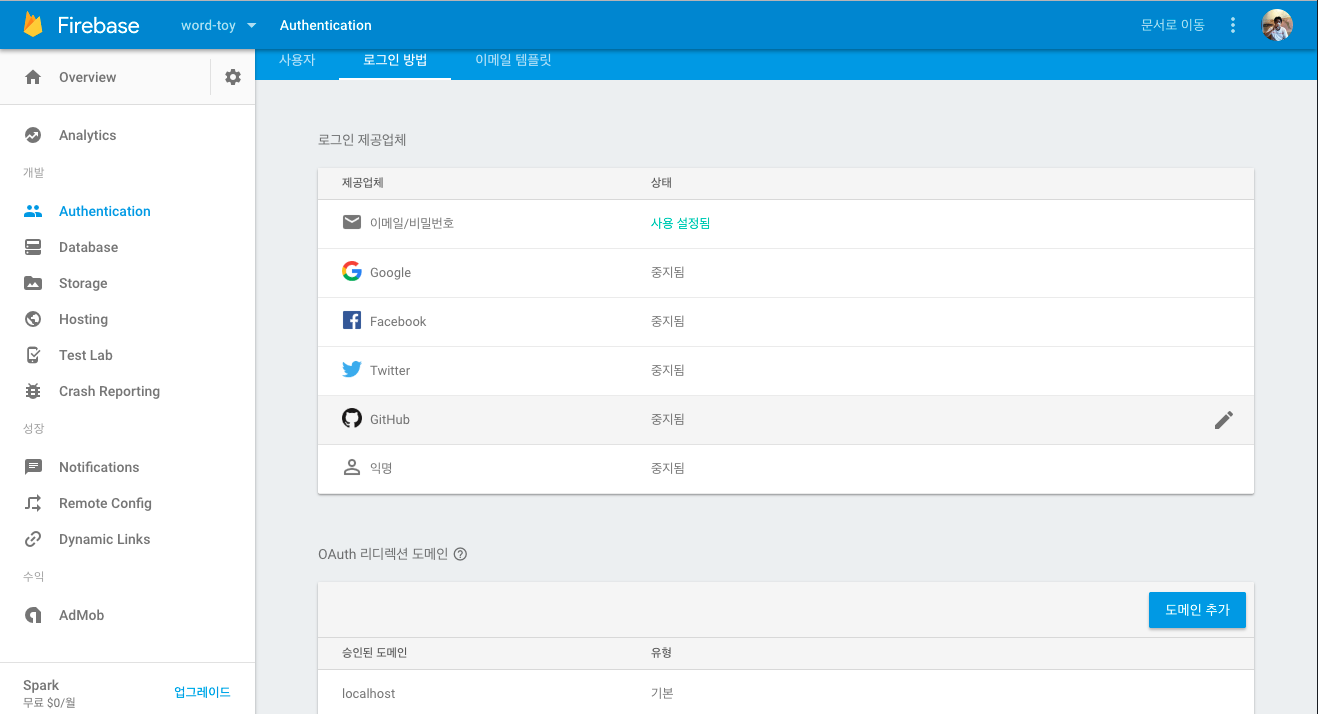
여기까지 하셨으면 Firebase console 에서 설정하시는 것은 마쳤습니다.
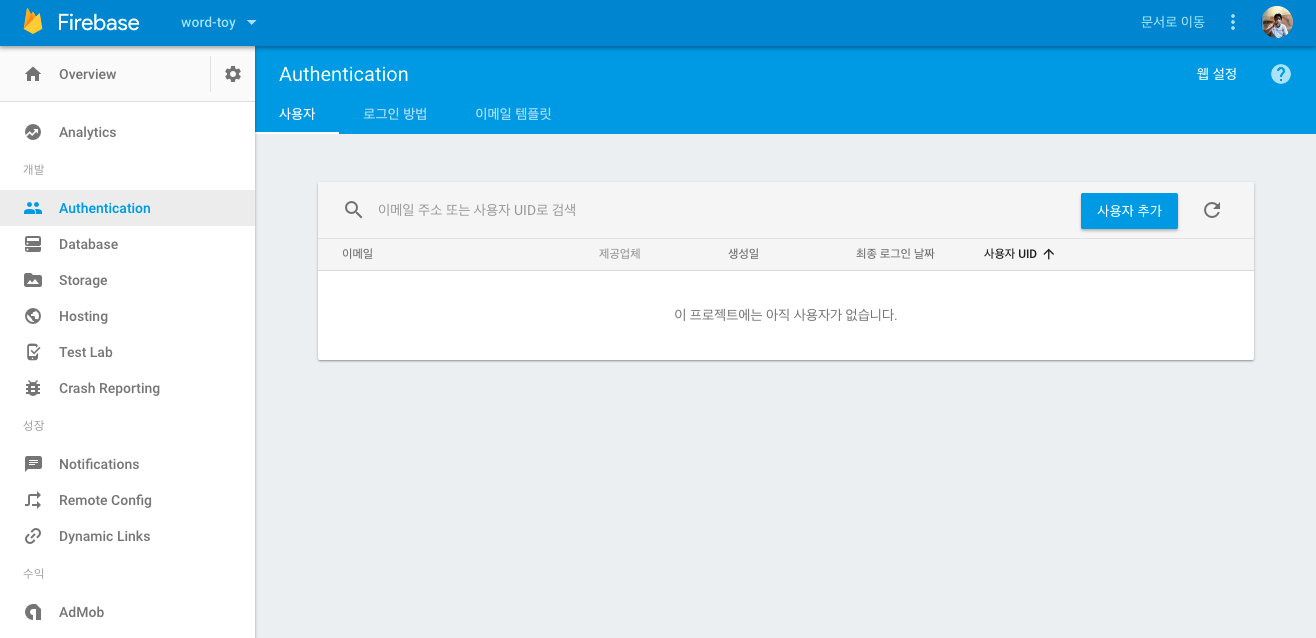
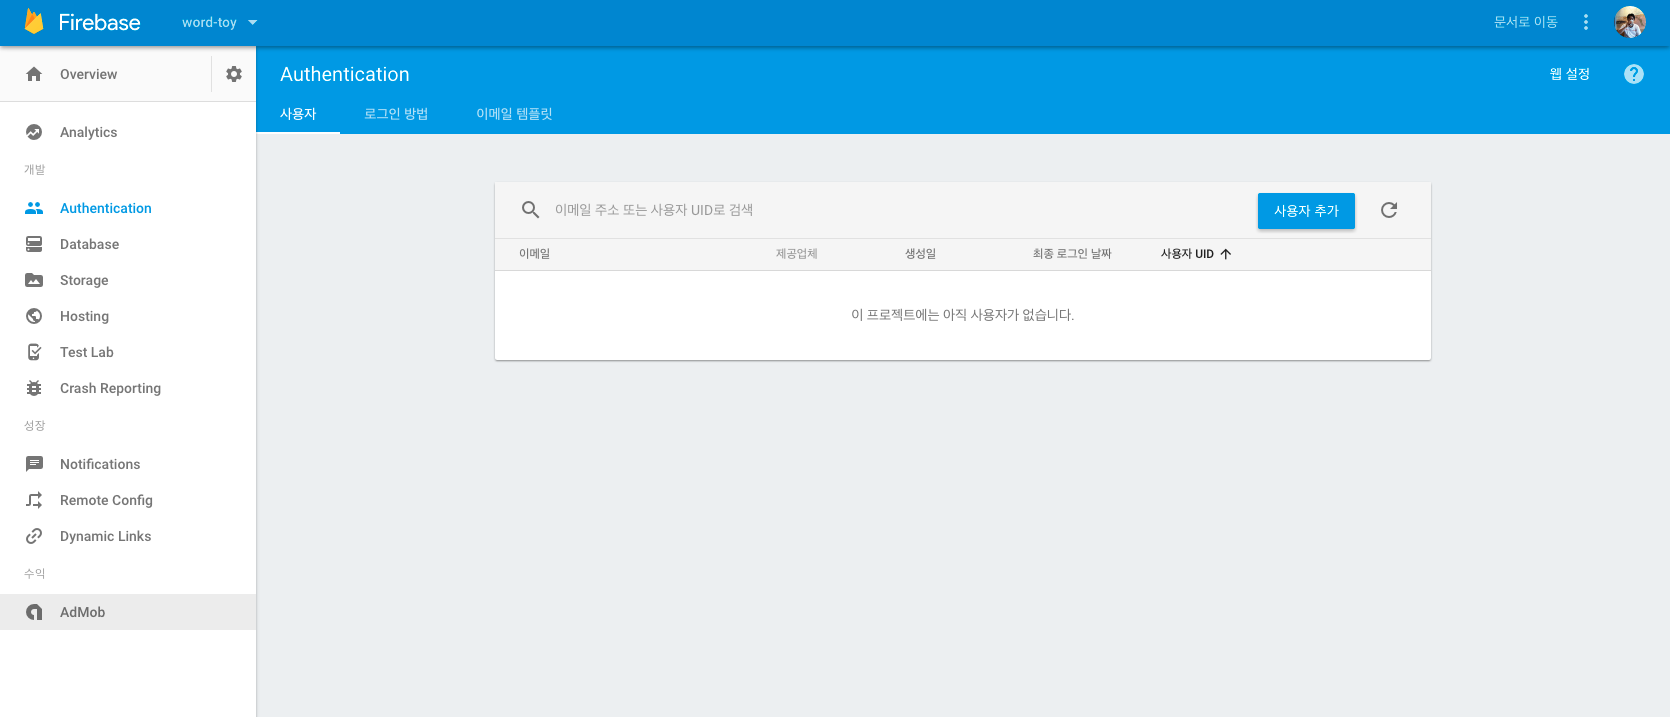
사용자 탭에서는 아직 SignUp한 사용자가 아직 없으므로 아래와 같이 나옵니다.
이제 build.gradle (
Firebase 인증에 대한 항목을 추가합니다. 아래 1줄.
compile 'com.google.firebase:firebase-auth:10.0.1'
위에 한줄을 추가하시고 , sync 하시면은 Android Project에 설정은 마쳤습니다.
##계정 생성하기
Email/password를 입력받아서 입력받은 데이타를 기준으로 계정을 생성하도록 하겠습니다.
private FirebaseAuth mAuth;
Context mContext;
// .....

@Override
protected void onCreate(@Nullable Bundle savedInstanceState) {
// ....
mContext = this;

// [START initialize_auth]
	mAuth = FirebaseAuth.getInstance();
   	// [END initialize_auth]
위와 같이 onCreate 메소드에서 FirebaseAuth의 인스턴스를 가져옵니다.
- AuthStateListener 추가
다음으로 사용자의 로그인 상태 변화에 따라서 이벤트를 받을 AuthStateListener를 추가합니다.
// [START declare_auth_listener]
private FirebaseAuth.AuthStateListener mAuthListener;
// [END declare_auth_listener]

@Override
protected void onCreate(Bundle savedInstanceState) {
    // ...
    // [START auth_state_listener]
    mAuthListener = new FirebaseAuth.AuthStateListener() {
        @Override
        public void onAuthStateChanged(@NonNull FirebaseAuth firebaseAuth) {
            FirebaseUser user = firebaseAuth.getCurrentUser();
            if (user != null) {
                // User is signed in
                Log.d(TAG, "onAuthStateChanged:signed_in:" + user.getUid());
            } else {
                // User is signed out
                Log.d(TAG, "onAuthStateChanged:signed_out");
            }
        }
    };
    // [END auth_state_listener]

@Override
public void onStart() {
    super.onStart();
    mAuth.addAuthStateListener(mAuthListener);
}

@Override
public void onStop() {
    super.onStop();
    if (mAuthListener != null) {
        mAuth.removeAuthStateListener(mAuthListener);
    }
}
위의 예제 처럼 onStart(), onStop() 메소드를 Override해서 앱이 시작될때 Listener을 설정하고 앱이 중지 되었을때 Listener를 해지를 해주시는 설정까지 추가 하도록 하겠습니다.
- 유효성 검사 (email, password)
비밀번호 6자리 이상 한글미포함
private boolean isValidPasswd(String target) {
    Pattern p = Pattern.compile("(^.*(?=.{6,100})(?=.*[0-9])(?=.*[a-zA-Z]).*$)");

    Matcher m = p.matcher(target);
    if (m.find() && !target.matches(".*[ㄱ-ㅎㅏ-ㅣ가-힣]+.*")){
      return true;
    }else{
      return false;
    }
}
이메일(email) 유효성 체크
private boolean isValidEmail(String target) {
	if (target == null || TextUtils.isEmpty(target) {
	  return false;
	} else {
	  return android.util.Patterns.EMAIL_ADDRESS.matcher(target).matches();
	}
}
위에 2개의 메소드를 이용해서 이메일 및 비밀번호의 유효성을 마쳤으면 createUserWithEmailAndPassword 를 이용해서 Firebase Authentication에 사용자를 추가하도록 하겠습니다.
// [START create_user_with_email]
mAuth.createUserWithEmailAndPassword(email, password)
        .addOnCompleteListener(this, new OnCompleteListener<AuthResult>() {
            @Override
            public void onComplete(@NonNull Task<AuthResult> task) {
                Log.d(TAG, "createUserWithEmail:onComplete:" + task.isSuccessful());

                // If sign in fails, display a message to the user. If sign in succeeds
                // the auth state listener will be notified and logic to handle the
                // signed in user can be handled in the listener.
                if (!task.isSuccessful()) {
                    Toast.makeText(mContext, "Authentication failed",
                            Toast.LENGTH_SHORT).show();
                }

                // [START_EXCLUDE]
                hideProgressDialog();
                // [END_EXCLUDE]
            }
        });
// [END create_user_with_email]
위의 코드까지 추가하셨으면 최종 완성된 메소드는 아래와 같습니다.
  private void createAccount(String email, String password) {
    if(!isValidEmail(email)){
      Log.e(TAG, "createAccount: email is not valid ");
      Toast.makeText(EmailPasswordActivity.this, "Email is not valid",
                  Toast.LENGTH_SHORT).show();
      return;
    }

    if (isValidPasswd(password)){
      Log.e(TAG, "createAccount: password is not valid ");
      Toast.makeText(mContext, "Password is not valid",
                  Toast.LENGTH_SHORT).show();
      return;
    }

    showProgressDialog();

    // [START create_user_with_email]
    mAuth.createUserWithEmailAndPassword(email, password)
        .addOnCompleteListener(this, new OnCompleteListener<AuthResult>() {
          @Override
          public void onComplete(@NonNull Task<AuthResult> task) {
            Log.d(TAG, "createUserWithEmail:onComplete:" + task.isSuccessful());

            // If sign in fails, display a message to the user. If sign in succeeds
            // the auth state listener will be notified and logic to handle the
            // signed in user can be handled in the listener.
            if (!task.isSuccessful()) {
              Toast.makeText(mContext, "Authentication failed",
                  Toast.LENGTH_SHORT).show();
            }

            // [START_EXCLUDE]
            hideProgressDialog();
            // [END_EXCLUDE]
          }
        });
    // [END create_user_with_email]
  }
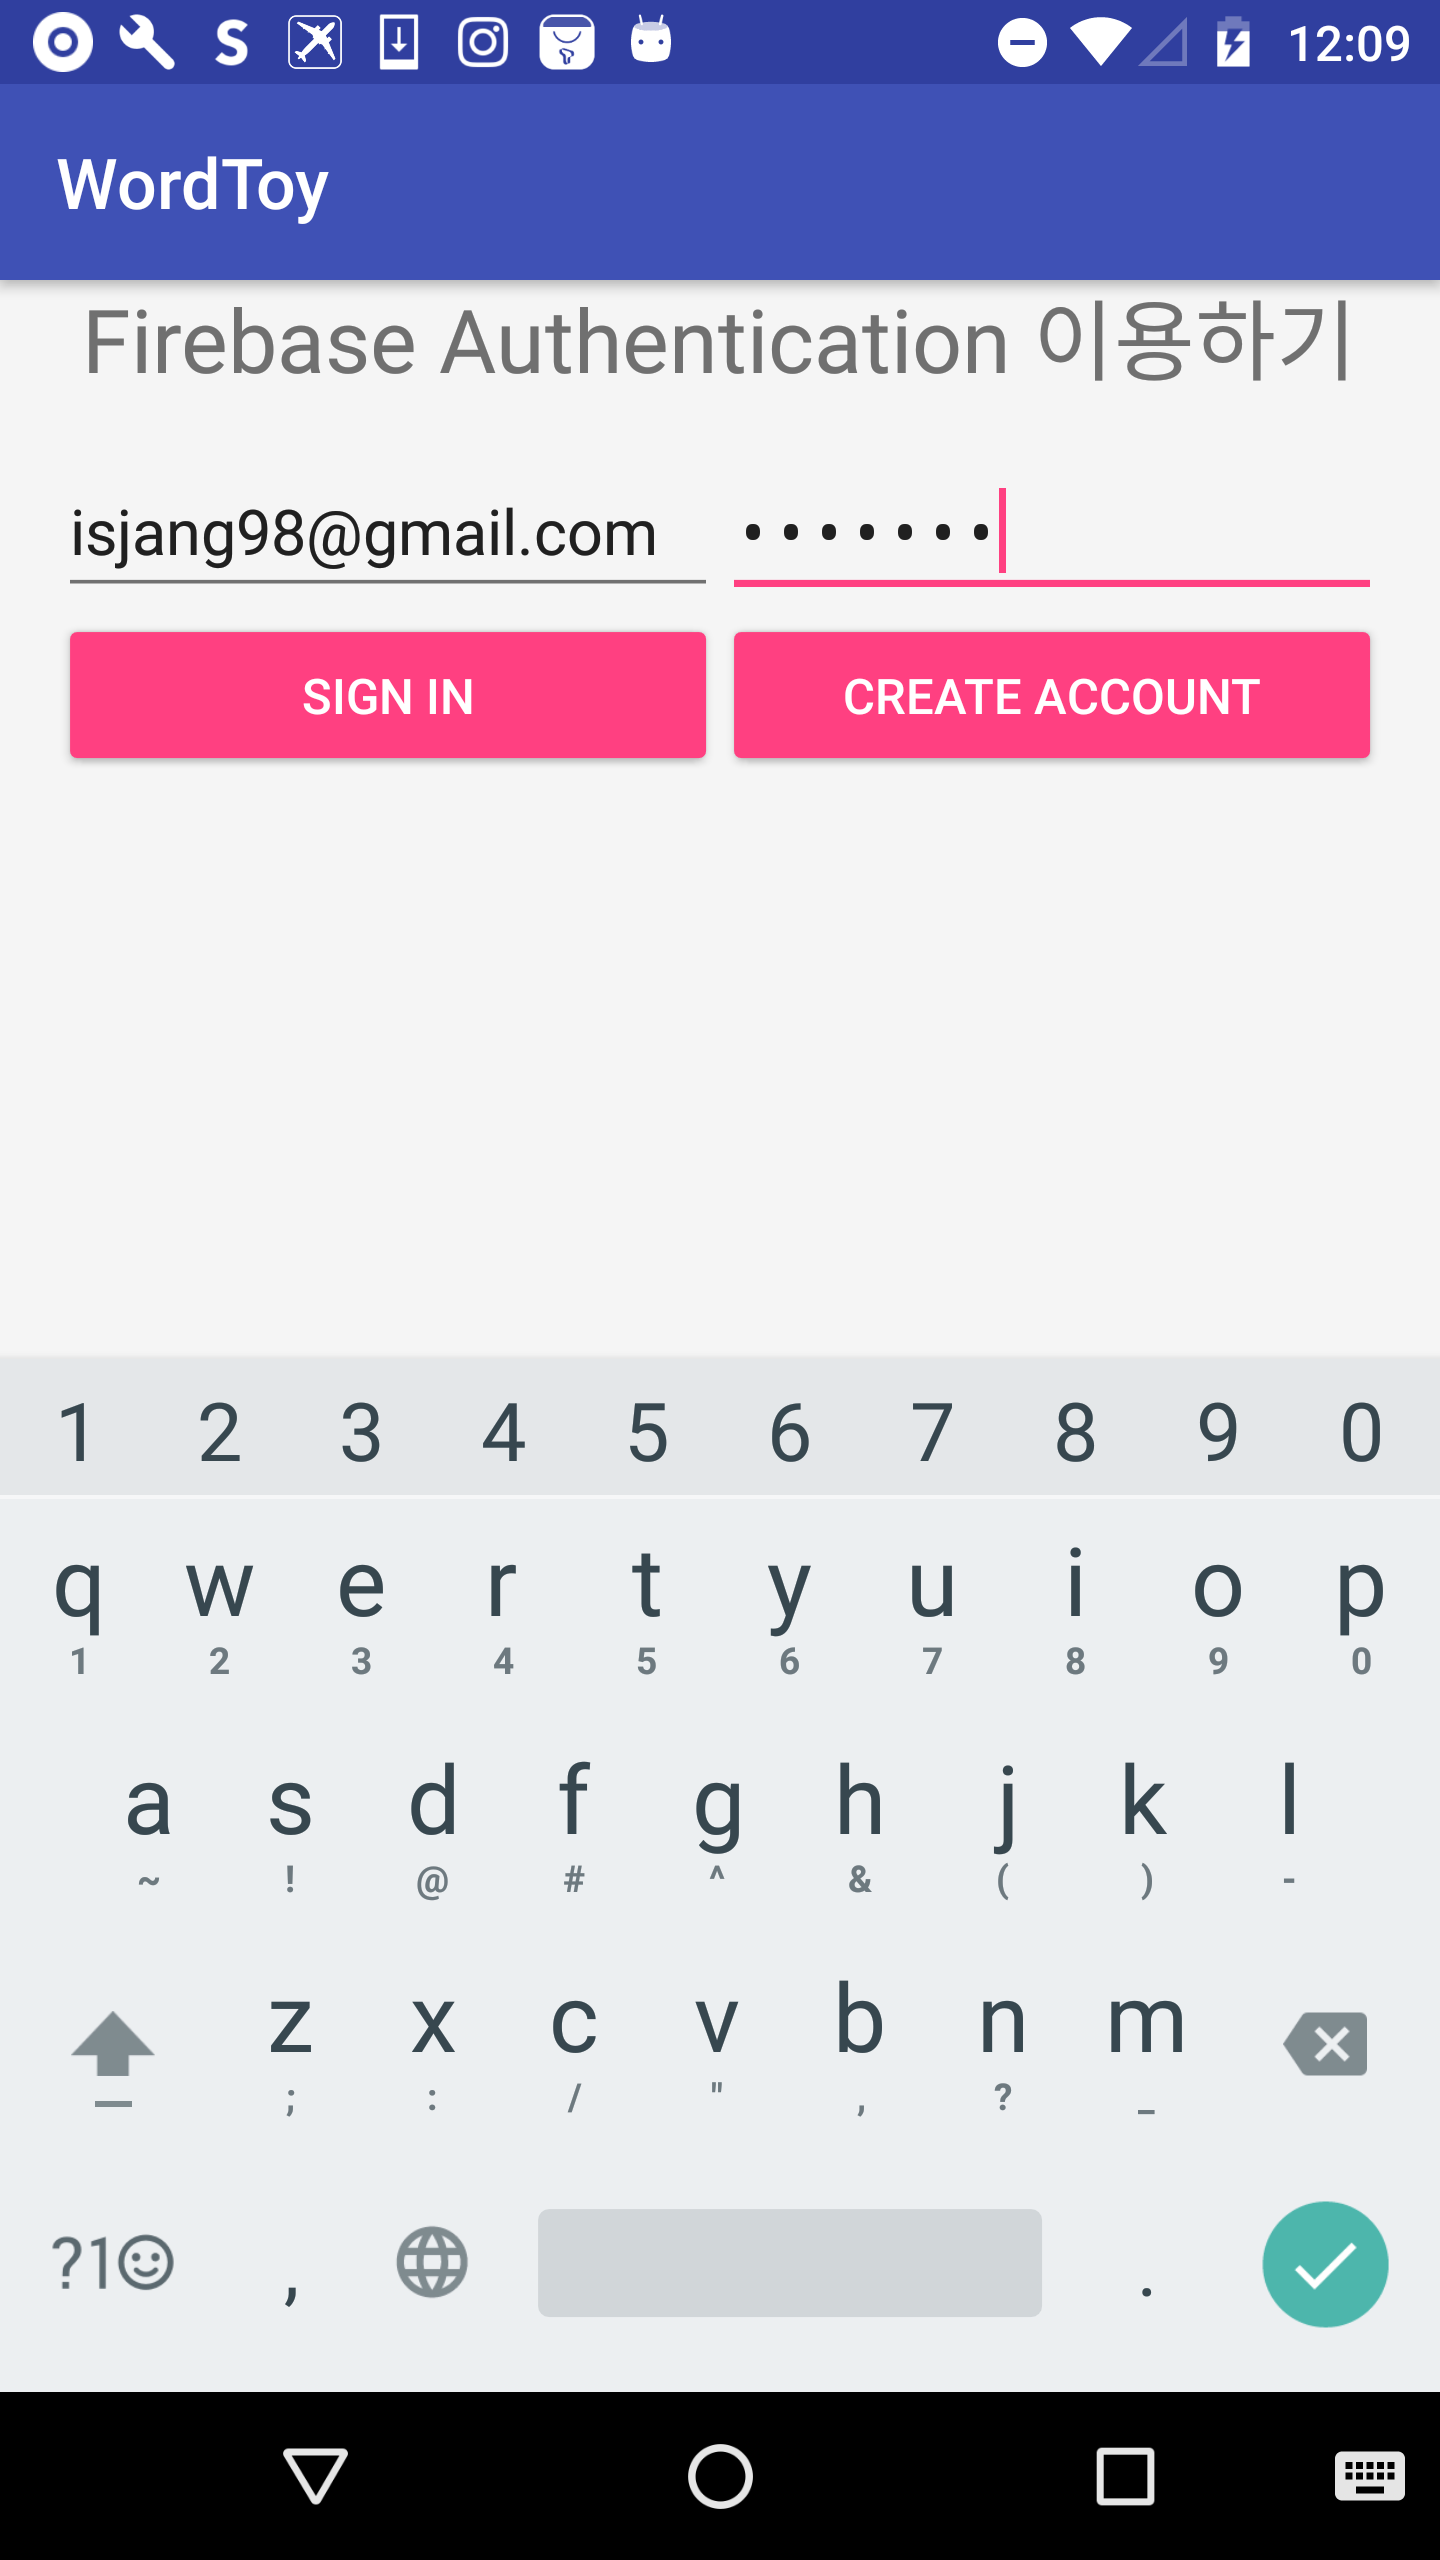
이제 각자 구성한 Layout 에 각각의 이벤트를 설정하시고 위에 createAccount(String email, String password) 를 호출하시면 사용자가 추가됩니다. 저는 아래 그림과 같이 Layout을 구성하였고, CREATE ACCOUNT 버튼의 Click 이벤트설정하여서 createAccount 를 호출하였습니다.
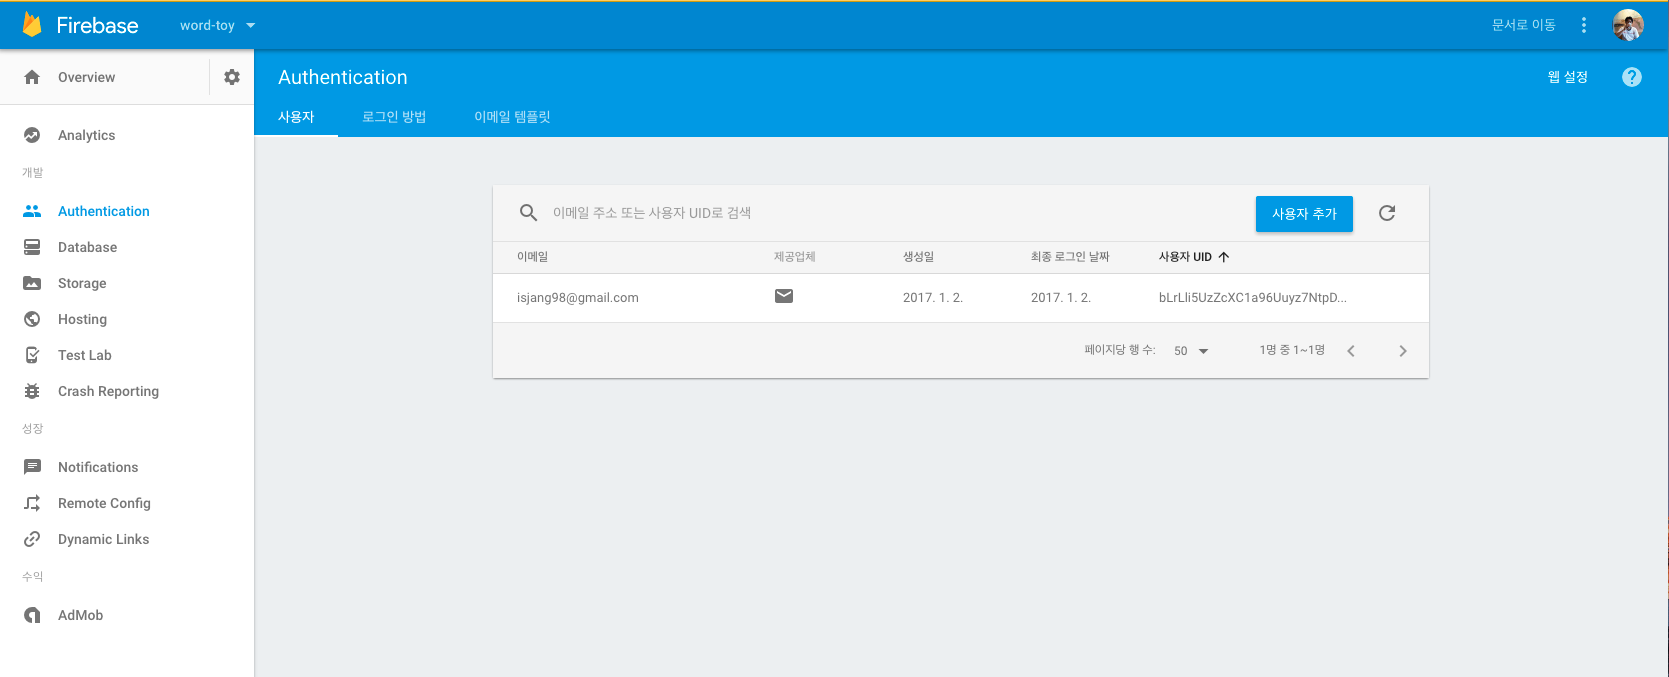
아래 그림에 볼수 있듯이 입력한 email/password를 가진 사용자가 추가가 되어집니다.
여기까지 마치셨으면은 이제 email/password를 가지고 앱에 로그인을 하도록 하겠습니다.
mAuth.signInWithEmailAndPassword(email, password)
    .addOnCompleteListener(this, new OnCompleteListener<AuthResult>() {
        @Override
        public void onComplete(@NonNull Task<AuthResult> task) {
            Log.d(TAG, "signInWithEmail:onComplete:" + task.isSuccessful());

            // If sign in fails, display a message to the user. If sign in succeeds
            // the auth state listener will be notified and logic to handle the
            // signed in user can be handled in the listener.
            if (!task.isSuccessful()) {
                Log.w(TAG, "signInWithEmail:failed", task.getException());
                Toast.makeText(EmailPasswordActivity.this, "Authentication failed",
                        Toast.LENGTH_SHORT).show();
            }

            // ...
        }
    });
위와 같이 추가하셔서 로그인을 하시면 로그인을 성공하면은 AuthStateListener 가 onAuthStateChanged 콜백을 실행합니다. 이 콜백에서 getCurrentUser 메소드를 통해서 계정 데이타를 가져올 수도 있습니다.
// ...
@Override
   	public void onAuthStateChanged(@NonNull FirebaseAuth firebaseAuth) {
	FirebaseUser user = firebaseAuth.getCurrentUser();
	user.getEmail(); // 사용자 이메일
	user.getUid();	// 사용자 UID
// ...
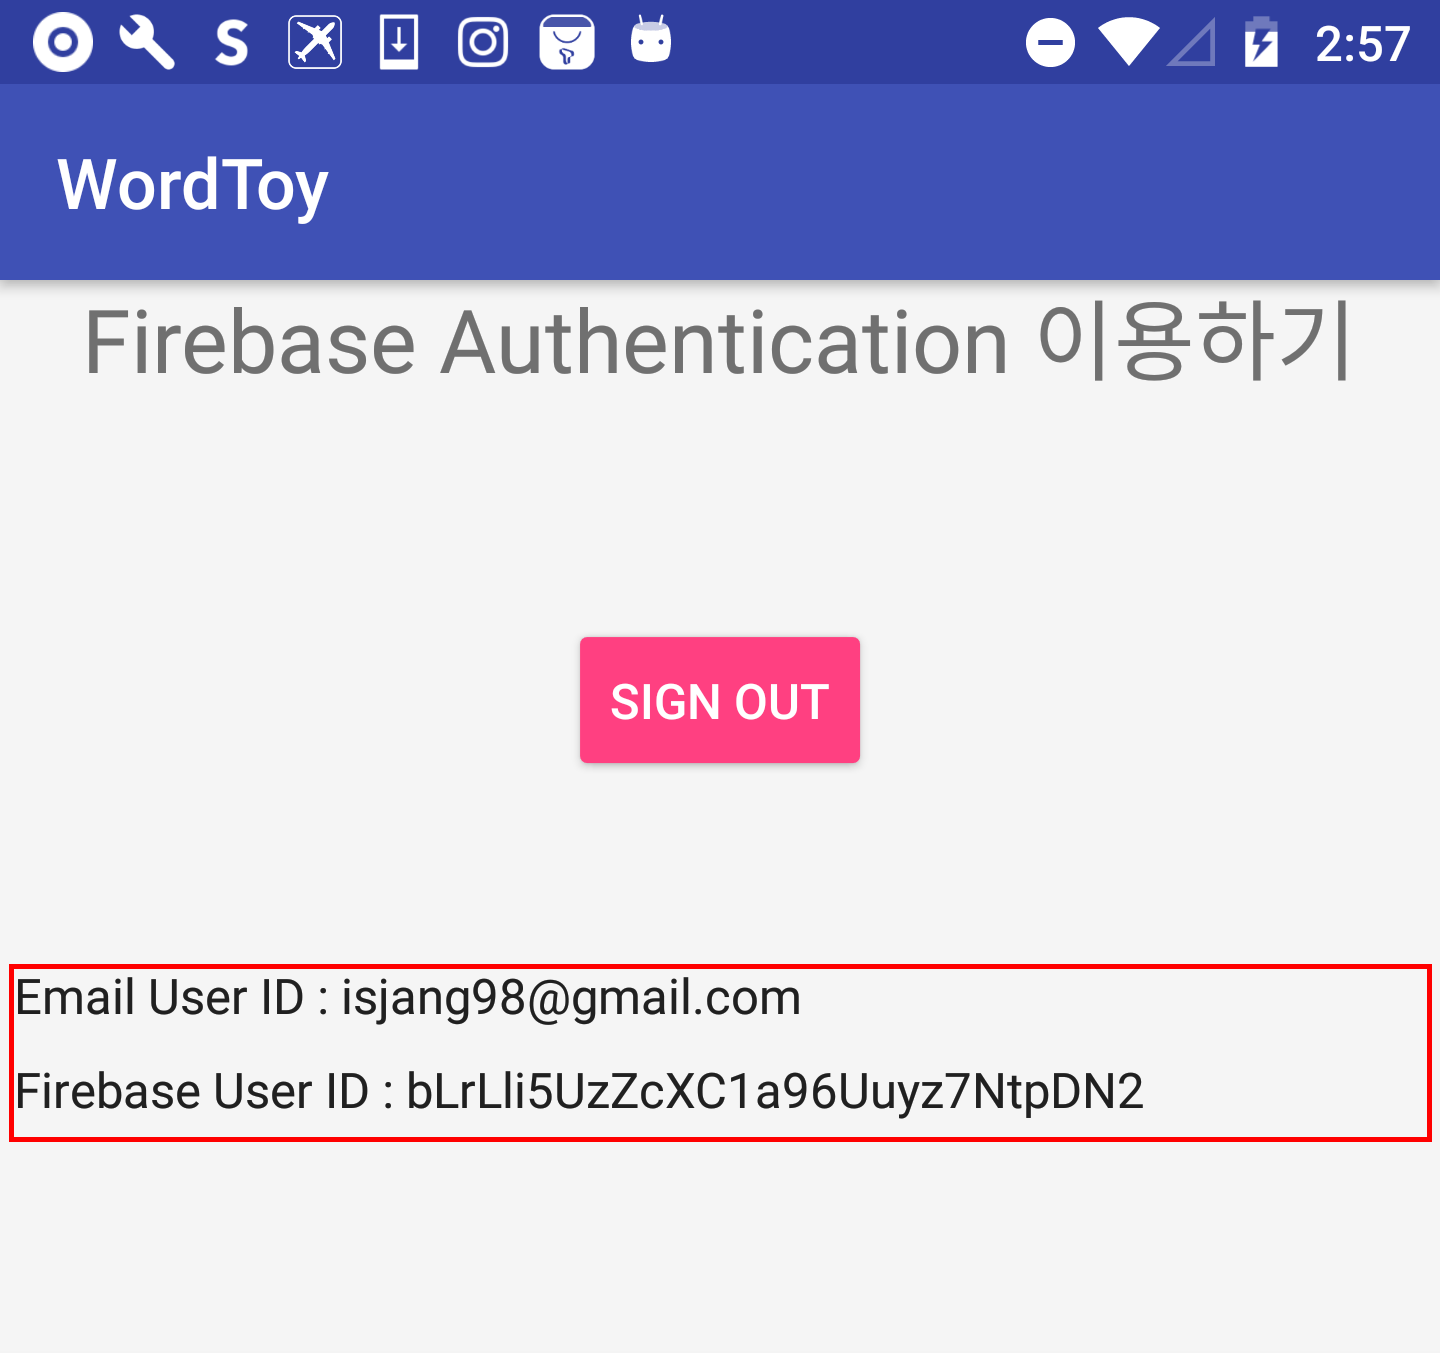
가져온 계정 데이타를 출력해보면은 아래와 같이 출력되는 것을 확인해볼수 있습니다.
이제 사용자추가, 로그인 까지 마쳤습니다. 마지막으로 로그아웃 을 추가하도록 하겠습니다.
로그아웃을 할려면은 아래와 같이 signOut 호출하면은 됩니다.
FirebaseAuth.getInstance().signOut();
마무리
Fireabe Authentication은 Google, Facebook, Twitte, GitHub 등을 지원을 하지만 한국 서비스에서 많이 사용하는 Kakao, Naver등을 아직 까지는 지원되지를 않습니다. Firebase 개발팀에서 서비스 개선을 하고 있으니 곧 지원되지 않을까 생각해봅니다. 제가 적용시켜본 결과 SignUp/SignIn 인 약간의 Delay가 발생이 하니 이부분은 참조 하시면 됩니다.